The Radio Shack Model III High-Resolution Board
Radio Shack introduced their high-resolution add-on for the Model III (catalog number 26-1125) on December 30, 1982 for a price of $369.95. It was never identified by name in any Radio Shack catalog but the official name seems to have been “TRS-80 Computer Graphics Package.” Few ever used that name and it was commonly referred to as the “Radio Shack high-resolution board.”
The Model III high-resolution board offered a resolution of 640 by 240. This was the same resolution as the Model II high-resolution add-on that Radio Shack had introduced the previous year, but it was higher than the normal Model III resolution of 512 by 192. There were so many similarities to the Model II high-resolution add-on that I suspect it was the basis for the Model III version.

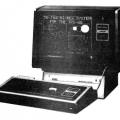
Model III high-resolution board from a 1983 Radio Shack catalog
To handle the higher-resolution, the board added a new video controller (the Motorola 6845) to the Model III. That same video controller was later used in the Model 4 and mapped to the same I/O ports. The new video controller offered some features that could have been useful, such as a hardware cursor or 80 by 24 text display, but unfortunately the board didn’t implement any of those extra features. Because early version of the board didn’t permanently program the video controller, the accompanying software reprogrammed it every time the high-resolution screen was enabled.
Installing the high-resolution board was quite involved and installation by a Radio Shack technician was mandatory. Despite the fact that installation was required, it wasn’t included in the price.
Software
The package came with a six high-resolution utilities:
- GCLS cleared the high-resolution screen.
- GROFF disabled the high-resolution screen.
- GRON enabled the high-resolution screen.
- GSAVE saved a high-resolution image to disk.
- GLOAD loaded a high-resolution image from disk.
- GPRINT printed a high-resolution image to a Radio Shack printer.
- GPRT2 printed an image optimized for a wide-carriage printer.
- GPRT3 also printed an image to a wide-carriage printer.
The printing utilities worked on a number of Radio Shack dot-matrix printers:
- Line Printer VII (catalog number 26-1167)
- Line Printer VIII (catalog number 26-1168)
- DMP-100 (catalog number 26-1253)
- DMP 200 (catalog number 26-1254)
- DMP-400 (catalog number 26-1251)
- DMP-500 (catalog number 26-1252)
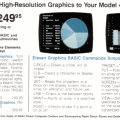
To assist programmers, the source code for all of the utilities was included with the manual. Also for programmers, there were libraries for FORTRAN and a special graphics BASIC named BASICG. BASICG was written by Microsoft and provided commands to manipulate the high-resolution screen (the same commands as the Model II version of BASICG).
Impact
There were very few programs written for the Radio Shack Model III high-resolution board. There was some third-party freeware and shareware, but not much commercial software. Radio Shack sold Business Graphics Analysis Program (catalog number 26-1597) for $174.95, a program that “turns complicated numeric data into easy-to-understand charts and graphs.” One notable compatible third-party software package was the drafting program xT.CAD by Microdex Corp.
In late-1983, Radio Shack introduced a Model 4 high-resolution board for $249.95, $80 less than the Model III version. The price of the Model III high-resolution board was dropped to $179.95 by the 1985 catalog and then to $99.95 by the 1986 catalog.


Matt says:
I’ve seen other claims that the Model III hi res board was hard to install but that was not my experience. We had two Radio Shack stores in our town – one was an “and Computer Center” and one was not. When the price dropped to $99 the “and Computer Center” store had one but they wouldn’t sell it to me without installation. So I went to the other store where they sold it to me but they didn’t have it, and sent me back to the Computer Center to pick it up and sure enough they handed it to me. Installation was very easy although I don’t recall there being any instructions. The hi res board itself was attached to a new metal cover for the mainboard enclosure – you just removed the old cover and replaced it with the new one with the hi res board. There were I think four electrical connection – a 50-pin ribbon cable that attached the 50-pin card edge on the mainboard, video out (unplug video cable from mainboard and connect it there), video in (connected to where the monitor used to connect to the mainboard), and power (I can’t remember how the power connection was made – if there was Y-cable or what). The most difficult part was because the graphic mode video size was different than the text mode size you had to adjust the vertical size and position to be a tradeoff between text and graphic modes, and the position of the video was influenced by whether the case was open and lying on its side besides the base or whether the cover was on. Adjusting the video took some trial and error and I could understand how Radio Shack wouldn’t want you doing this step. But overall the installation wasn’t difficult.